


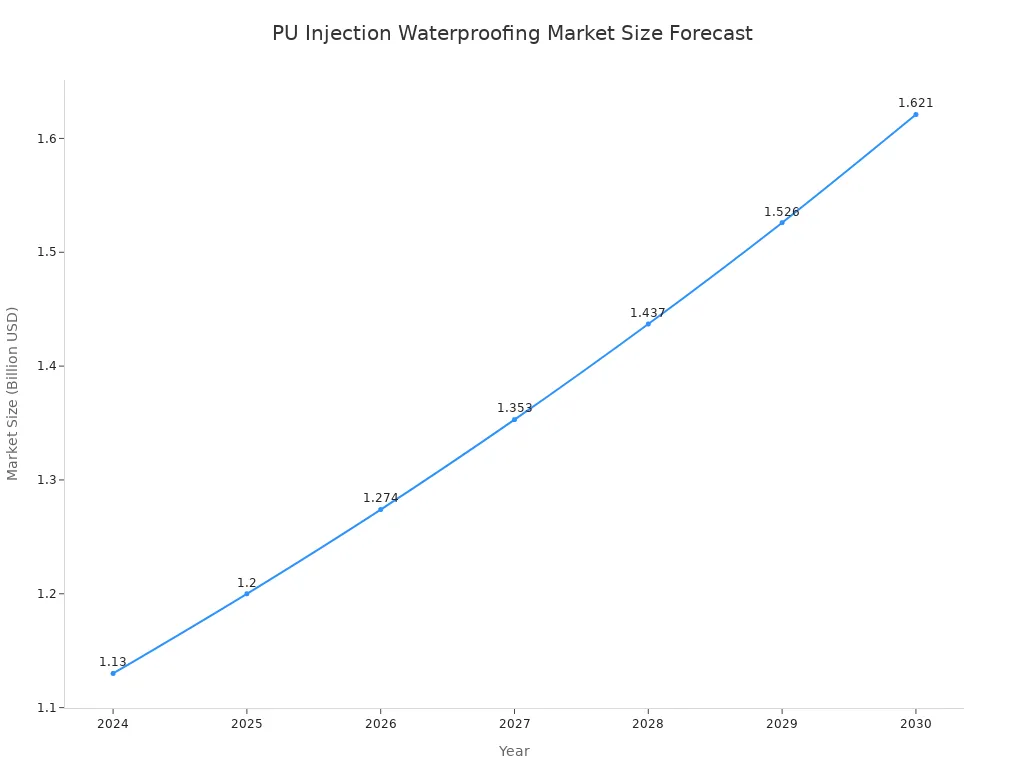
Proper packer use achieves lasting waterproofing. Effective injection techniques ensure structural integrity. Mastering Plastic Pu Injection Packer applications leads to optimal outcomes. The Global Waterproofing Injection Grouting Market expands significantly. Experts project it will reach USD 6.5 billion by 2035, demonstrating a 5.4% Compound Annual Growth Rate (CAGR) from 2025 to 2035. This growth underscores the importance of precise methods in the industry.
Key Takeaways
- Proper use of plastic PU injection packers ensures lasting waterproofing and structural repair.
- Thorough site assessment and crack analysis are important before starting any injection work.
- Choose the right packer size and type for the crack dimensions and injection method.
- Use precise drilling techniques and optimal spacing for effective packer placement.
- Control injection pressure and monitor resin flow to fill cracks completely.
- Always wear proper safety gear, including eye, skin, and respiratory protection.
- Verify the repair with visual checks and water tests to confirm no leaks remain.
Understanding Plastic PU Injection Packers
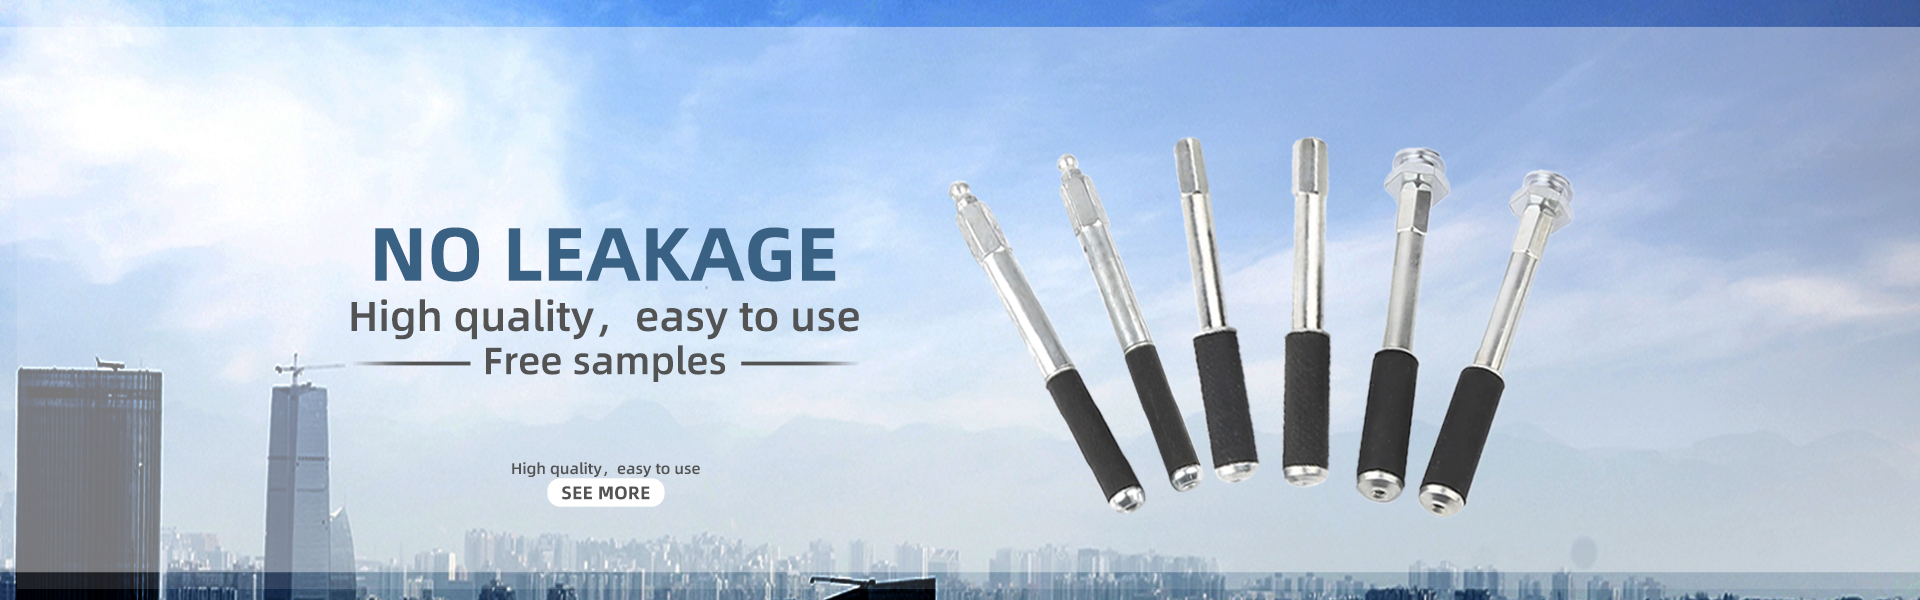
What Are Plastic PU Injection Packers?
Plastic PU injection packers are specialized consumables. Professionals use them for treating concrete cracks, expansion joints, and construction joints. They work with PU (polyurethane) or epoxy injection materials. These packers accurately deliver grout into tiny cracks. They achieve reinforcement, waterproofing, and leak sealing effects. This makes them suitable for various underground and above-ground projects.
Components and Design of Plastic Packers
A plastic PU injection packer has a compact structure. It mainly consists of a plastic body, a rubber expansion ring, and a metal nozzle. This design allows for easy installation and removal. It improves on-site construction efficiency. It also reduces overall project cost. Plastic PU injection packers can be composed of PA66 Nylon. Product listings for ‘Aluminium PA66 Nylon Injection Grouting Conical Packers Resin Plastic PU Injection Packer’ indicate this material. Some plastic PU injection packers are also specified to be made of steel.
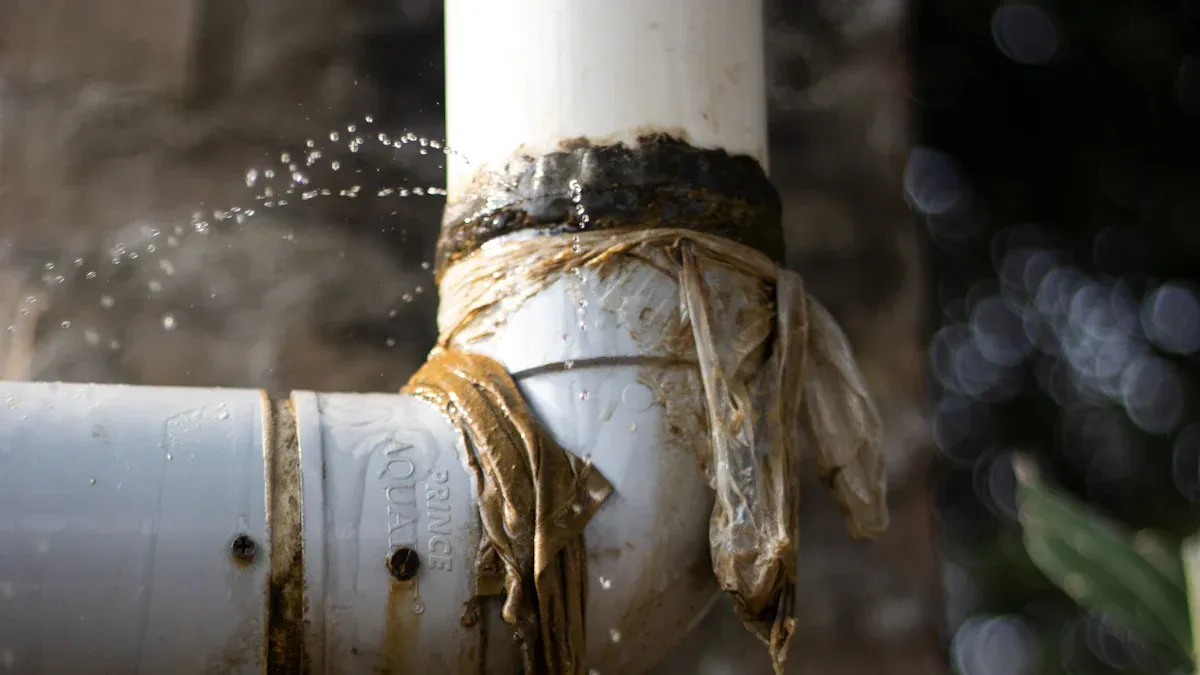
Role in Concrete Waterproofing
Plastic PU injection packers play a crucial role in concrete waterproofing. They create a sealed pathway for the injection material. This ensures the grout reaches the deepest parts of a crack. The packer prevents resin from flowing out prematurely. It directs the material precisely where needed. This process effectively stops water ingress. It also restores the structural integrity of the concrete.
Advantages of Plastic PU Injection Packers
Plastic PU injection packers offer several benefits. These advantages make them a preferred choice in many waterproofing applications.
Cost-Effectiveness and Lightweight Design
The plastic injection packer offers low manufacturing cost. Its lightweight design makes it suitable for large-batch purchasing and transportation. It serves as a disposable or limited-reuse consumable. This helps control overall project costs. Its affordability makes it accessible for various project scales.
Suitability for Diverse Project Types
These packers are highly versatile. They are suitable for diverse project types. Transportation and municipal projects benefit from them. These include metro tunnels, highway tunnels, culverts, and utility tunnels. They are ideal where dense packer layouts are required in confined workspaces. This improves repair efficiency. Hydraulic and industrial facilities also use them. These include water tanks, reservoirs, and sewage tanks. They ensure long-term structural stability and anti-seepage performance. Structural strengthening and repair firms also apply them. They use them in epoxy injection and structural grout applications. This enhances project reliability.
Types of Plastic PU Injection Packers
Different types of plastic PU injection packers exist. Each type suits specific crack conditions and injection methods.
Mechanical Plastic Packers
Mechanical plastic packers use a tightening mechanism. Workers insert them into a drilled hole. They then tighten a nut. This expands a rubber sleeve. The sleeve creates a secure seal against the concrete. This type provides a strong, reliable anchor for injection.
Screw-In Plastic Packers
Screw-in plastic packers feature a threaded body. Workers screw them directly into a pre-drilled hole. The threads create a tight fit. This eliminates the need for external tightening. They are quick to install. They provide a firm seal for injection.
Push-In Plastic Packers
Push-in plastic packers are simple to use. Workers push them into a drilled hole. The design relies on friction and the packer’s conical shape for a seal. They are ideal for quick applications. They work well in situations with lower injection pressures.
Pre-Injection Best Practices for Plastic PU Injection Packers
Effective pre-injection practices lay the groundwork for successful waterproofing. Professionals must meticulously plan and execute each step. This ensures optimal results and long-term structural integrity.
Comprehensive Site Assessment
A thorough site assessment forms the foundation of any successful injection project. This initial phase identifies critical areas and prepares surfaces for treatment.
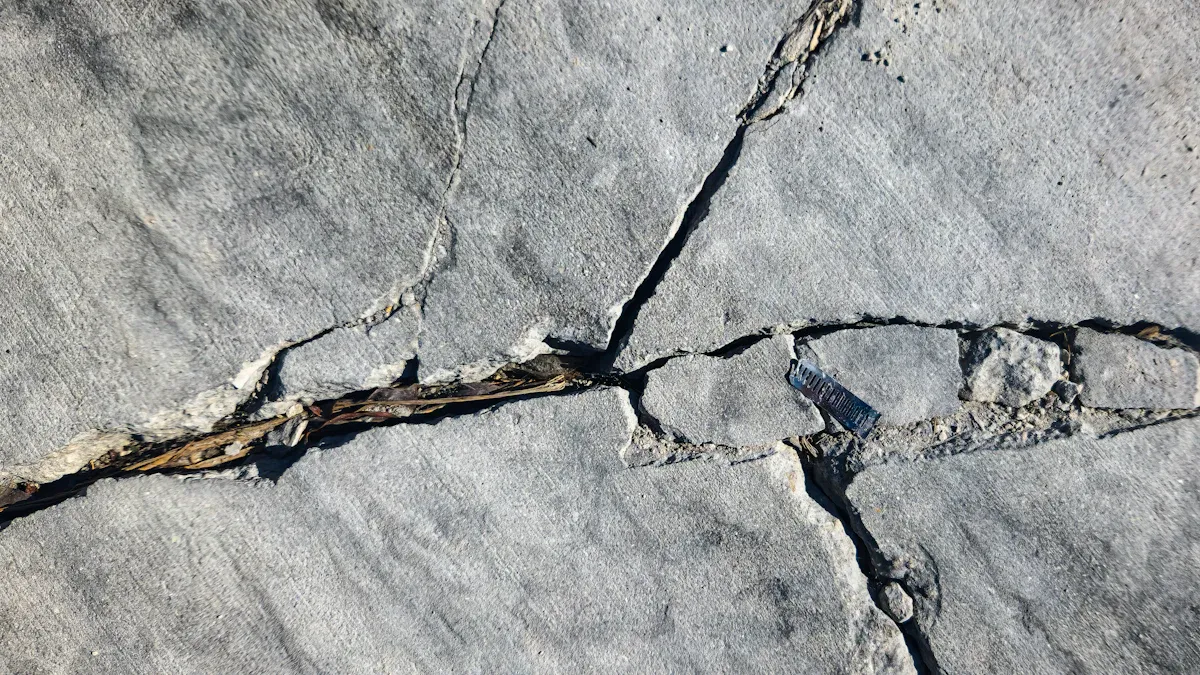
Identifying Leakage Points and Crack Analysis
Professionals begin by systematically identifying all leakage points. They conduct a comprehensive analysis of cracks. This process often involves a systematic professional detection process. This includes shut-off isolation, meter checks, and zone pressure testing. Workers also use tool triangulation. This involves acoustic listening devices, thermal cameras, and moisture meters. Internal RH probes provide definitive moisture assessment deep within concrete. Acoustic and infrared thermal imaging pinpoint leaks with precision. This systematic engineering approach involves understanding existing designs. It also includes searching for leak paths and performing proper tests. These steps discover the root cause of the leakage.
Surface Preparation for Optimal Adhesion
Proper surface preparation is crucial for optimal adhesion of the injected resin. Workers clean the concrete surface thoroughly. They remove loose debris, dirt, grease, and any existing coatings. Grinding or wire brushing may be necessary to expose sound concrete. This creates a clean, porous surface. A well-prepared surface ensures the resin forms a strong bond with the concrete.
Selecting the Right Plastic PU Injection Packer
Choosing the correct Plastic Pu Injection Packer is vital for effective and efficient injection. Several factors influence this selection.
Matching Packer Size to Crack Dimensions
Matching the packer size to crack dimensions ensures an effective seal. A larger mechanical packer diameter allows for higher injection pressures. Common diameters include 5/8”, ½”, 3/8”, and 1/4” for man-made structures. The packer diameter should equal the drill hole diameter. This minimizes blow-out and ensures proper installation. The packer shaft must recess deep enough into the drill hole. This creates an adequate seal and prevents substrate spalling. For weaker substrates and deteriorated concrete, longer packers (4” to 6” or 10-15cm) are recommended. An extended shaft length benefits bridging gaps within the substrate.
Material Compatibility with PU Resins
Professionals must ensure the packer material is compatible with PU resins. Most plastic packers are designed for use with polyurethane and epoxy materials. They resist chemical degradation from these resins. This compatibility prevents material breakdown during injection. It also maintains the integrity of the seal.
Estimating Required Packer Quantity
Accurately estimating the required packer quantity prevents project delays. Workers consider the length and density of cracks. They also account for the chosen spacing between packers. Overestimating provides a buffer for unexpected needs. Underestimating can halt work.
Precision Plastic PU Injection Packer Placement
Precise placement of packers directly impacts injection effectiveness. Correct drilling and spacing are essential.
Drilling Techniques for Correct Angle and Depth
Drilling techniques require careful attention to angle and depth. For high-pressure injection (HPI), workers drill 3/8″ diameter holes. They start drilling approximately 1″ above the floor. They continue up to the sill plate. Workers drill holes alongside the crack, about 3″ to either side. They maintain an angle of approximately 45-55 degrees. This intersects the crack’s ‘vein’ at a depth of about 4″ into an 8″ thick wall. This ensures optimum Polyurethane Resin penetration. Professionals expect 18 to 20 injection points on average, spaced 5-6″ apart. They flush out drilling dust and debris with water after drilling.
Optimal Spacing Between Packers
Optimal spacing between packers ensures complete resin distribution. The spacing depends on crack width, concrete thickness, and resin viscosity. Closer spacing is necessary for fine cracks or highly viscous resins. Wider spacing works for larger cracks or less viscous materials. Proper spacing prevents resin from bypassing untreated sections.
Secure Installation of Plastic Packers
Secure installation of plastic packers prevents blowouts during injection. Workers select larger diameter packers for better blowout prevention. They ensure the drill hole diameter matches the packer diameter. They recess the packer shaft deep enough. This creates an adequate compression seal and prevents substrate spalling. Longer packers (4” to 6” / 10-15 cm) are used for weak substrates or deteriorated concrete. This ensures a strong and reliable fit of the packers for safety and successful injection. Workers use a special striker when installing plastic packers. This prevents valve deformation and leakage. Plastic packers are ideal for lower pressures (below 60 BAR). Avoiding direct hits to the packer head without a striker prevents valve deformation and reduces tightness.
Mastering the Injection Process with Plastic PU Injection Packers
Mastering the injection process ensures effective waterproofing and structural repair. This phase requires careful preparation, precise technique, and vigilant troubleshooting. Professionals achieve optimal results by adhering to best practices at every step.
Preparing the PU Resin for Injection
Proper preparation of the polyurethane (PU) resin is fundamental for successful injection. This involves accurate mixing and understanding environmental factors.
Accurate Mixing Ratios and Procedures
Accurate mixing ratios are critical for the PU resin to cure correctly. Manufacturers provide specific guidelines for combining the resin components. Workers must follow these instructions precisely. They measure each component carefully, often by weight or volume. Thorough mixing ensures a homogeneous blend. This allows the resin to react and harden as intended. Improper mixing can lead to incomplete curing or a compromised seal.
Understanding Pot Life and Temperature Effects
Understanding pot life and temperature effects is essential for resin performance. Pot life refers to the time the mixed resin remains workable before it begins to harden. Temperature significantly influences both pot life and curing times of PU injection resins. Higher temperatures, such as above 30°C, lead to a substantial decrease in both pot life and curing times. Conversely, lower temperatures, below 12°C, result in an increase in pot life and curing times. The optimal application conditions are around 24°C.
Humidity also plays a crucial role in the curing process. Moisture in the air can react with the resin, especially moisture-sensitive types like some polyurethanes. This reaction can lead to the formation of small air bubbles. These bubbles reduce hardness and durability. High humidity also slows down the curing process. Water competes with resin components for reactions. While humidity below 80% is generally acceptable for hardening, an ideal range of 50-60% is recommended for optimal, smooth, and glossy results. Humidity exceeding 80% can cause the resin to become sticky and waxy. Temperature also affects the stability of reactants in resin and curing agent mixtures. Excessively high temperatures can trigger unwanted reactions or decomposition. Temperatures that are too low may not provide sufficient energy to initiate the curing reaction. This can lead to incomplete or imperfect curing. Adhering to the manufacturer’s recommended optimal temperature range is crucial for consistent curing.
Controlled Injection Techniques with Plastic Packers
Controlled injection techniques ensure the resin effectively penetrates and seals the cracks. This involves managing pressure, monitoring flow, and employing a strategic approach.
Initial Pressure and Flow Rate Management
Initial pressure and flow rate management are vital for effective injection. Workers typically start with low pressure. They gradually increase it as needed. This prevents blowouts and ensures controlled resin distribution. The appropriate pressure depends on crack size and resin viscosity.
| Crack Size | Resin Viscosity (mPa·s) | Injection Stabilization Pressure (MPa) |
|---|---|---|
| 1 mm | 5679 | 0.28 |
| 1 mm | 384 | 0.12 |
| 1 mm | 96 | 0.10 |
| 1 mm | 48 | 0.07 |
| N/A | < 100 (at 20 °C) | < 0.1 |
For very fine cracks, such as 0.5 mm, epoxy resin typically requires an injection pressure below 0.075 MPa. This careful approach ensures the resin fills the crack without causing damage to the concrete or the Plastic Pu Injection Packer.
Monitoring Resin Flow and Penetration
Monitoring resin flow and penetration ensures complete crack filling. Workers observe the resin emerging from adjacent packers or along the crack surface. This indicates the resin has traveled through the crack network. Advanced monitoring techniques also exist.
- Thermocouple Sensing: This method detects when a mold is filled. It identifies significant temperature gradients between mold walls and feed resin. It can also predict cure onset by measuring exothermic behavior.
- Flexible Dielectric Sensing System: This system monitors various production process phases. These include flow front, matrix (de)vitrification, cure progress, and end of cure. It offers higher sensitivity than thermocouples.
- Thermal In-situ Monitoring System: This system detects defects and localizes tapes based on temperature differences. Processing parameters like material temperature influence these differences. This aids in analyzing defect features and laminate quality.
- Ultrasonic C-scan Technique: This technique studies the RTM manufacturing process. It particularly examines the effect of injection pressure. It can reveal void content and morphology. These are indicators of resin flow and can impact mechanical properties.
Sequential Injection Strategy for Full Coverage
A sequential injection strategy ensures full coverage in complex crack networks. Workers typically start injecting from the lowest packer. They move upwards systematically. This allows gravity to assist resin flow. It also pushes air out of the crack. For horizontal cracks, they inject from one end to the other. This method ensures the resin displaces all water and air. A reservoir simulation study on unconventional gas reservoirs highlights the importance of achieving adequate primary fracture conductivity. This significantly increases gas recovery and initial production rates. It minimizes the impact of un-propped network fracture conductivity and primary fracture spacing. This principle applies to crack injection. A systematic approach ensures the resin reaches all parts of the crack network. This creates a robust, leak-free seal.
Troubleshooting During Plastic PU Injection Packer Use
Troubleshooting common issues during injection helps maintain project efficiency and effectiveness. Addressing problems promptly prevents larger complications.
Addressing Blockages and Resin Run-Off
Workers may encounter blockages or resin run-off during injection. Blockages can occur if debris is present in the crack or if the resin cures too quickly. Workers can try increasing pressure slightly or re-drilling the packer hole. Resin run-off indicates an open path or insufficient sealing. Workers can temporarily plug the run-off point. They can also use a faster-setting resin to quickly seal the opening.
Recognizing and Resolving Incomplete Fills
Recognizing and resolving incomplete fills is crucial for a complete seal. Incomplete fills occur when the resin does not fully penetrate the crack network. Indicators include a lack of resin emergence from adjacent packers or a hollow sound when tapping the concrete. Resolving incomplete fills requires re-injection. Workers might need to install additional packers. They might also use a lower viscosity resin. Various methods exist for addressing missing data, which can be analogous to incomplete fills in crack injection. These include imputing with averages or midpoints, using advanced techniques like K-Nearest Neighbors (KNN), or replacing with the previous or next value. Interpolation methods such as ‘polynomial,’ ‘linear,’ and ‘quadratic’ can also be used. For categorical features, workers can impute the most frequent value or treat ‘missing’ as a separate category. These strategies, when adapted to injection, help ensure all voids receive resin.
Two-Stage PU Approach for Gushing Water
A two-stage PU approach effectively handles gushing water. Gushing water can wash away standard resins before they cure. In the first stage, workers inject a fast-reacting, water-activated PU foam. This foam expands rapidly upon contact with water. It temporarily stops or significantly reduces the water flow. Once the gushing water is controlled, workers proceed with the second stage. They inject a slower-curing, more permanent PU gel or resin. This material provides a durable, long-term waterproof seal. This two-stage method ensures effective sealing even in challenging wet conditions.
Post-Injection Verification and Cleanup for Plastic PU Injection Packers
After completing the injection process, verification and cleanup steps are crucial. These actions confirm the repair’s effectiveness and restore the site. Professionals ensure the injected resin cures properly and the treated area remains leak-free.
Curing and Setting Times for PU Resin
Understanding the curing and setting times for PU resin is essential. These periods dictate when workers can proceed with subsequent steps.
Environmental Factors Affecting Cure
Environmental factors significantly influence the curing of polyurethane resins.
| Resin Type | Curing Time (hours) | Temperature Range (°F) |
|---|---|---|
| Polyurethane Resin | 24 – 72 | 80 – 200 |
| Humidity notably impacts the curing process. Moisture in the air reacts with the resin. This reaction can lead to air bubble formation. These bubbles reduce the material’s hardness and durability. High humidity also slows the curing process. Water competes with resin components in chemical reactions. This effect is particularly pronounced for moisture-sensitive plastics. |
Monitoring Curing Progress and Hardness
Professionals monitor curing progress and hardness to ensure optimal results. They visually inspect the resin for solidification. They also perform hardness tests. This confirms the resin has achieved its intended strength. Polyurethane resins can be demolded within minutes to several hours. This depends on whether they are fast-setting or standard formulations.
Plastic PU Injection Packer Removal and Hole Repair
Proper removal of the Plastic Pu Injection Packer and subsequent hole repair maintains the structural integrity and aesthetics of the concrete.
Safe Removal Techniques for Packers
Safe removal techniques prevent damage to the cured resin or concrete. A general rule for safe packer removal is to ensure the injected product has fully cured. This prevents damage to the resin or concrete.
- Workers pull the injection port/packer directly out of the structure.
- They drill the injection port/packer clear to below the surface by at least 3 inches.
For MABI plastic injectors, a recommended safe removal technique after the epoxy cures is to simply cut off the injector head. This method is safe because MABI injectors are plastic. They will not rust, preventing damage to the structural element.
Patching and Sealing Drill Holes
Patching and sealing drill holes are necessary after packer removal.
- Bottom or stem-installed valves allow removal of the top portion of the packer early after injection. This keeps the drill holes sealed for patching. The remainder of the packer stays in the substrate.
- As a rule, packers should not be removed before the injected product has fully cured.
- In some designs, workers can break off the shaft by hammer after injection. This leaves a flush surface.
Surface Finishing for Aesthetic Integration
Surface finishing ensures the repaired area blends seamlessly with the surrounding concrete. Workers apply a suitable patching compound. They then smooth it to match the existing texture. This step enhances the overall appearance of the repair.
Leakage Verification After Plastic PU Injection Packer Application
Leakage verification confirms the success of the waterproofing efforts.
Visual Inspection and Water Testing Procedures
Visual inspection and water testing procedures verify leak-free results. Professionals adopt an objective observer’s perspective. They look for clues like puddles, drips, stains, or unusual sounds. They also check for signs of water damage. They consider both large-scale areas and smaller details.
- Workers examine the repaired concrete for any signs of moisture.
- They carefully check for water pooling around the treated area.
- They perform a dye test if necessary. This involves introducing a colored dye to the water source. They then observe if the dye appears at the repaired crack.
- They record observations.
Hydrostatic testing is another method. It uses water or another liquid to pressurize the system. This detects leaks. The system fills with water and pressurizes. Leaks are identified by observing water escape or measuring pressure drops.
For effective inspection, adequate lighting is crucial. Use visible light for inspections with bubble tests. Use UV light for inspections with fluorescent tracer gases. Environmental control is also important. Perform inspections in a controlled environment. This avoids contamination and ensures consistent results.
Long-Term Monitoring for Assured Results
Long-term monitoring provides assurance of lasting results. Professionals schedule periodic inspections. They check for any recurrence of leakage. This proactive approach helps maintain the integrity of the repair over time.
Ensuring Complete Sealing of Cracks
The ultimate goal is ensuring complete sealing of cracks. This prevents future water ingress. It also protects the structural integrity of the concrete. Thorough verification confirms this objective.
Safety Considerations for Plastic PU Injection Packers
Professionals prioritize safety when working with plastic PU injection packers and resins. Adhering to strict safety protocols protects workers and ensures a successful project. Proper preparation and awareness of potential hazards are crucial for every injection job.
Personal Protective Equipment (PPE) for Injection Work
Wearing appropriate Personal Protective Equipment (PPE) is non-negotiable during injection work. PPE safeguards workers from chemical exposure and potential injuries.
Eye, Skin, and Respiratory Protection
Workers must protect their eyes, skin, and respiratory systems. They use goggles for eye protection. Protective clothing prevents skin contact with resins. This minimizes exposure to hazardous materials. In areas with poor ventilation or high vapor concentrations, workers wear respirators.
Hand Protection and Chemical-Resistant Gloves
Gloves are essential for hand protection. Workers wear chemical-resistant gloves to shield their hands from PU resins. These gloves prevent skin irritation and absorption of chemicals. Regular inspection of gloves ensures their integrity.
Safe Handling of PU Resins
Safe handling of PU resins involves careful management of the work environment and materials. This prevents accidents and contamination.
Ventilation Requirements and Spill Containment
Proper ventilation is critical, especially in enclosed spaces. Mechanical ventilation, such as fans or exhaust systems, disperses fumes and maintains air quality. Regular air quality monitoring ensures hazardous substance concentrations remain below permissible exposure limits (PELs). Portable ventilation equipment provides fresh air to the immediate work area. It also exhausts humidity, vapors, and odors. Workers ensure exhaust ducts do not introduce contaminated air into occupied areas. They consider best practices for containment and ventilation from regulatory bodies.
Proper Storage and Disposal of Materials
Proper storage and disposal of PU resins and contaminated materials are vital. Workers check local regulations for chemical waste disposal. Many communities offer designated hazardous waste facilities. If allowed, workers cure leftover resin fully before disposal. They never mix resin with regular trash. For large quantities, professionals consult chemical waste disposal services. Empty MDI drums should not be burned or cut open. They should be stored securely until proper disposal. Intermediate Bulk Containers (IBCs) often have recycling programs. Five-gallon pails and small sample containers require decontamination with a neutralization solution before disposal.
Equipment Safety for Plastic PU Injection Packers
Maintaining equipment safety prevents malfunctions and ensures efficient operation. Regular checks and emergency procedures are key.
Pressure Gauge Monitoring and Hose Integrity
Workers consistently monitor pressure gauges on injection equipment. This ensures operation within safe limits. They also inspect hoses for any signs of wear, damage, or leaks. Maintaining hose integrity prevents unexpected ruptures and resin spills.
Emergency Shut-Off Procedures and Protocols
Clear emergency shut-off procedures are essential for high-pressure injection equipment. Workers identify all energy sources. They isolate and lock out each source. They release residual pressure and verify the system is de-energized. Attaching lockout/tagout devices ensures the system remains isolated. Workers know how to quickly disconnect or shut down the hydraulic system in case of malfunction. They keep absorbent materials and chemical spill kits on hand. Training employees in first aid specific to hydraulic injuries is also important. Posting emergency contact numbers and conducting drills prepares the team for any incident.
Achieving durable, leak-free results requires adherence to best practices. Professionals ensure optimal outcomes by mastering plastic PU injection packer applications. Effective use involves several key takeaways:
- Accurate site assessment and crack analysis.
- Correct packer selection and precise placement.
- Controlled injection techniques and vigilant monitoring.
- Thorough post-injection verification and cleanup.
The waterproofing industry continuously improves its techniques, demanding ongoing skill development. This commitment to best practices ensures lasting structural integrity and effective moisture control.
FAQ
What are plastic PU injection packers used for?
Plastic PU injection packers treat concrete cracks, expansion joints, and construction joints. They deliver polyurethane or epoxy grout. This achieves reinforcement, waterproofing, and leak sealing in various structures.
Why choose plastic PU injection packers?
Plastic PU injection packers offer cost-effectiveness and a lightweight design. They suit diverse projects, including tunnels, reservoirs, and structural repairs. Their affordability makes them ideal for large-scale use.
How do you select the correct packer size?
Match the packer size to the crack dimensions. A larger diameter allows higher injection pressures. The packer diameter should equal the drill hole diameter. This minimizes blow-out and ensures proper installation.
What is the importance of surface preparation before injection?
Proper surface preparation ensures optimal adhesion of the injected resin. Workers clean the concrete surface thoroughly. They remove debris, dirt, and coatings. A clean, porous surface allows the resin to form a strong bond.
How do environmental factors affect PU resin curing?
Temperature and humidity significantly influence PU resin curing. Higher temperatures decrease pot life and curing times. Lower temperatures increase them. High humidity can cause air bubbles and slow the curing process.
What should you do if resin runs off during injection?
Resin run-off indicates an open path or insufficient sealing. Workers can temporarily plug the run-off point. They can also use a faster-setting resin. This quickly seals the opening and prevents further leakage.
How do you safely remove plastic packers after injection?
Ensure the injected product has fully cured before removing packers. Workers can pull the packer directly out. Alternatively, they can drill the packer clear to below the surface. Some plastic packers allow cutting off the head.
What PPE is required for PU injection work?
Workers must wear appropriate Personal Protective Equipment (PPE). This includes goggles for eye protection. Protective clothing prevents skin contact. Chemical-resistant gloves shield hands. Respirators are necessary in poorly ventilated areas.
Post time: Dec-22-2025